I accidentally added Raymond Hunter as a child of Ray Arthur Hunter but they are the same person. I could delete Ray but then I would have to add all of his information to Raymond {I don't like typing that much}.

Legacy has a merge feature built in that will allow you to combine duplicate people in your database. Since they are father and son Legacy will not let me merge the two. First, I have to unlink Raymond from his parents and then I can merge them.
After I unlinked Raymond I went to Ray {the father} and then clicked on the Tools tab in the top menu bar in Legacy and then clicked on Merge Duplicates. {See image below}.

You are given 3 options 1 Manual Merge, 2 Find Duplicates, and 3 Not-Dup list {this gives you a list of individuals marked as not duplicates}. I chose the first one, Manual Merge which you can see in the image above. {If you choose Find duplicates Legacy will look in your database for duplicate entries and let you decide what to merge.}
The image below is the window that opens once you select Manual Merge. Ray Arthur Hunter is the one I want to merge Raymond Hunter into. Click on Select Right Individual {in the red box in the image below} and this will allow you to select the person you want to merge.

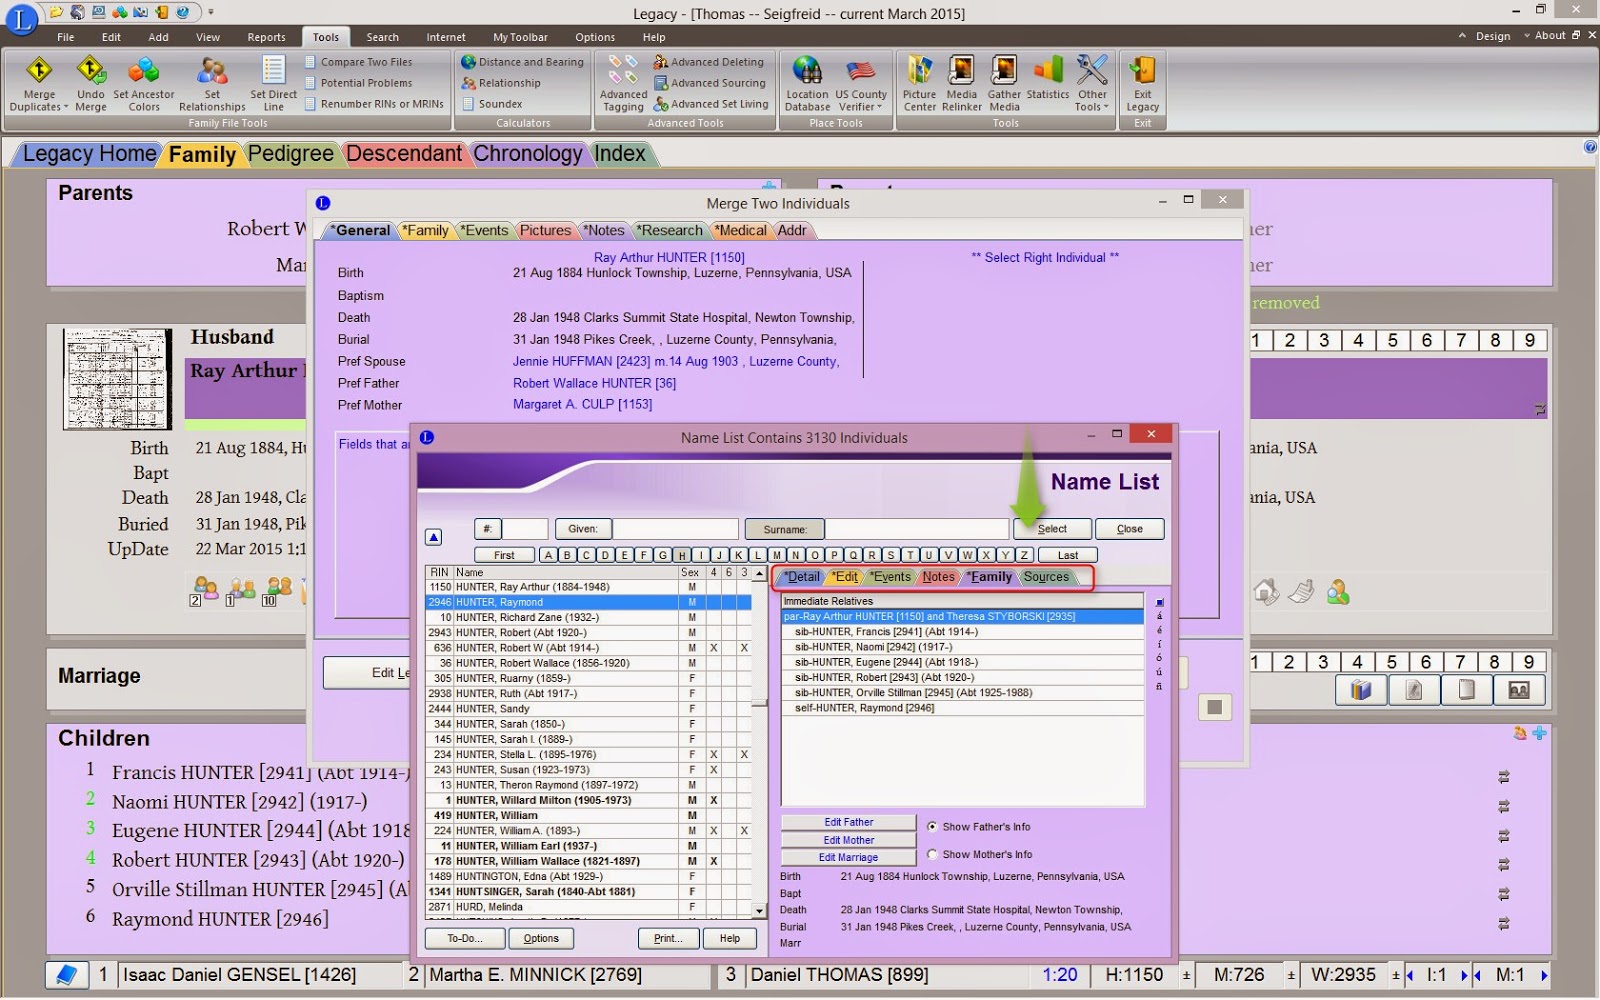
This is where you select the person to merge. In the red box you see Ray Arthur Hunter and just below him there is Raymond Hunter.

I highlighted Raymond and checked his information to make sure he was the correct person by clicking on the tabs in the red box. These tabs let you view the selected individuals information; it is a good idea to check these to confirm that you have the correct individual when doing a manual merge. Then I clicked on Select {next to the search boxes marked with the green arrow.}
Here is where you begin to merge your two individuals. Ray Arthur Hunter is the person I wan to keep and he is on the left and Raymond Hunter is the want I want to merge and he is on the right. Select the information you want to keep by clicking on the dial in front of the information.

Make sure you go through each tab and check that the information you want to keep is selected. The image below shows the events tab. There is a story attached to Raymond that I want to move to Ray. I highlighted the event and then clicked on Copy below Raymond's information.

This moves the story event to Ray. Then continue on to each tab until you have all of you information moved over.


Once you are sure you have everything you want to merge selected or moved over to the other person you will click on Merge Right Individual into Left Individual.

This box will open once the merge is completed. Go to the person you merged and check to make sure everything looks the way it should.

You can undo your merge by going to the Tools menu and selecting Undo Merge from the toolbar if something did not merge the way you wanted.

I periodically check for duplicates to make sure I did not accidentally add someone twice; it helps keep my database clean.
If you have any questions at all please let me know.
Happy Sunday!
Comments
Post a Comment